

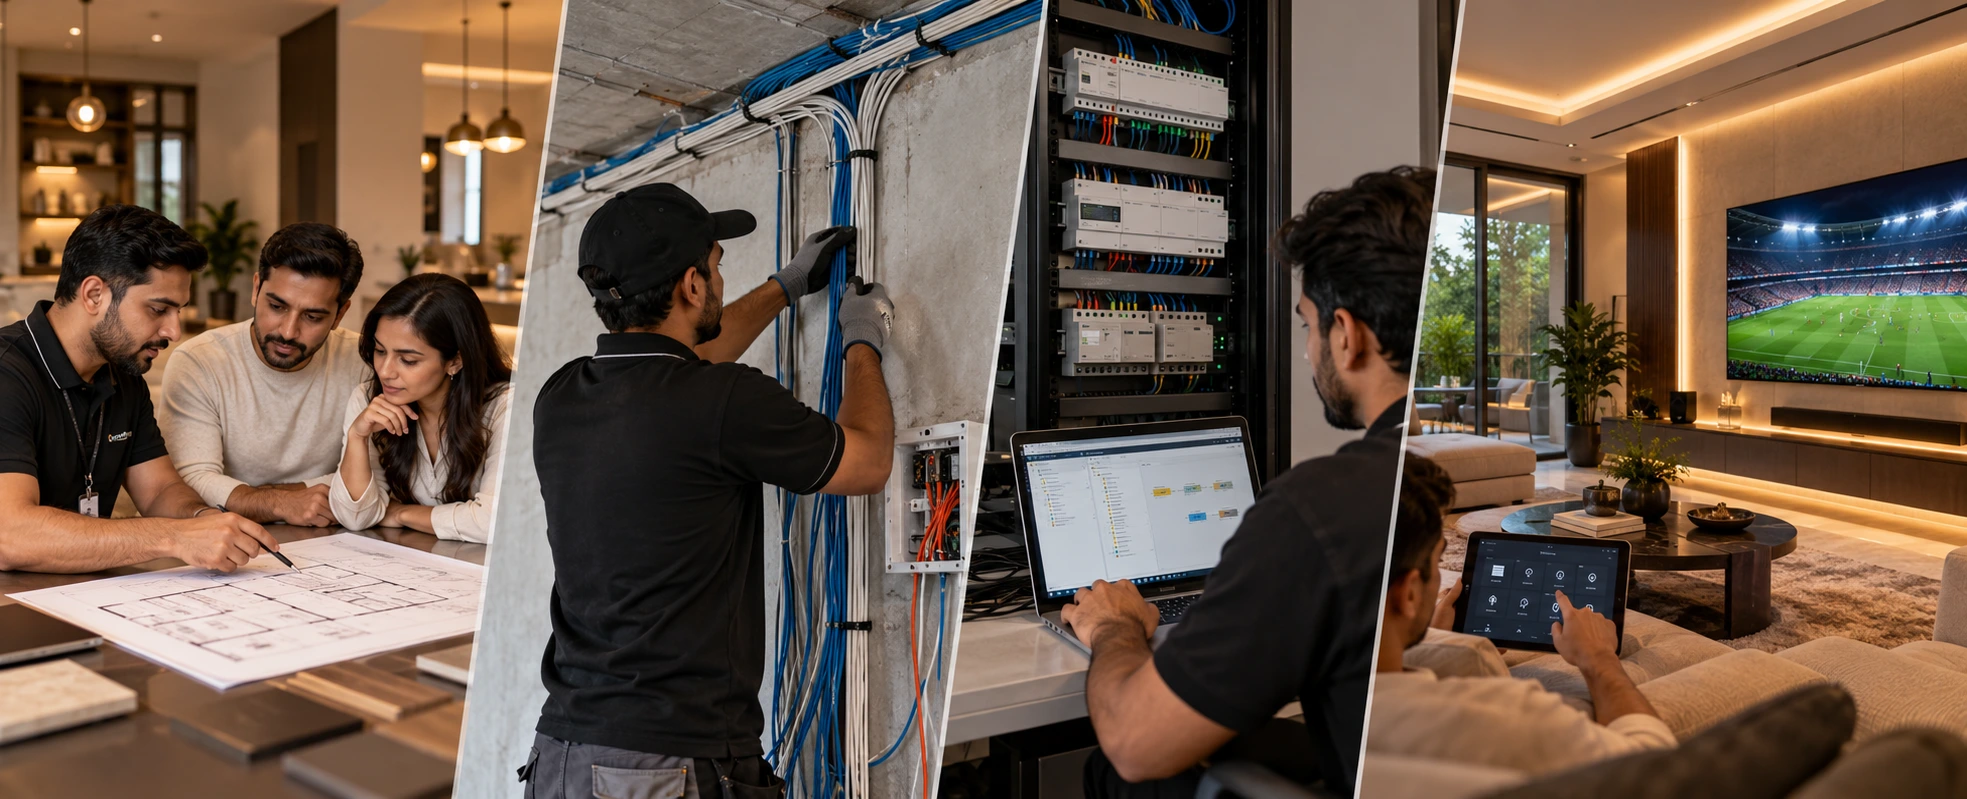
Most people researching a smart home find plenty on what it does and almost nothing on how it actually gets installed — the stages, the planning, and what drives the cost. Yet that is exactly what decides whether you end up with a reliable, serviceable system or an expensive source of frustration. Home automation done well is a designed project, not a box of devices someone fits in an afternoon. This guide walks through the real installation process from first survey to handover, how to plan it, and what shapes the price.
Why the installation process matters
It is tempting to think of home automation as a product you buy and have fitted. It is not. It is a system that has to be designed for your home, wired or configured correctly, programmed, tested, and handed over so you can actually use and maintain it. Skip or rush any of those stages, and the result shows — systems that are unreliable, hard to use, or impossible for anyone else to service later.
This is why the process matters as much as the products. A good installation is run like a project, with clear stages, so nothing is improvised and the finished system is reliable, usable, and serviceable for years. Understanding those stages also makes you a better client — you know what to expect, what to ask for, and how to tell a proper integrator from a device-fitter. For the fundamentals of what a smart home is, our complete guide to home automation is a good starting point.
Stage 1 — Site survey and needs discussion
Every good installation starts not with products but with understanding: your home and how you live in it. A proper integrator visits the site (or reviews the plans for a new build), looks at the layout and conditions, and talks through what you actually want — which rooms, what should be automated, how you like to control things, and your budget.
This stage is where the system is shaped around you rather than sold to you. For a new build, it is done from the plans; for an existing home, it assesses what can be accessed and worked with. Getting this right is what makes everything after it fit your home.
Stage 2 — System design and specification
With the needs understood, the system is designed — a clear specification of what goes where and how it all connects. This is the blueprint: the control scheme for each room, the devices and keypads, the wiring and network layout, and how the systems (lighting, climate, security, AV and more) will work together.
A proper design decides this on paper before anything is installed, so the project is built to a plan rather than figured out on site. It is also where the choice of platform matters — a reliable, open standard like KNX is what makes a whole-home system dependable and expandable; our comparison of wired vs wireless smart homes covers that choice.
Stage 3 — Wiring and infrastructure
This is the stage that cannot be easily undone, so it is the most important to get right. The control wiring and network cabling — the backbone the whole system runs on — are installed according to the design. On a wired KNX system this is the bus cabling that connects the controls; alongside it go the structured network, power provisions and the cabling for every system.
For a new build or renovation, this is done during construction, before the walls are closed — which is exactly why planning automation early matters so much. Our guide to what a KNX cable is explains the backbone. For a finished home, this stage adapts to what can be accessed, sometimes using wireless where new cabling is impractical.
Stage 4 — Programming
Here the system is brought to life. The devices are configured and programmed so they do what the design intended — the scenes, the schedules, the way each keypad behaves, how the systems respond to each other. On KNX, this is done in ETS6, the professional programming software; our guide to ETS6 KNX programming explains it.
This is skilled work, and it is what separates a smart home that is a pleasure to use from one that is confusing. Good programming makes the system simple on the surface and sophisticated underneath — and it is captured in a project file that becomes yours at handover.
Stage 5 — Commissioning and testing
Before the system is handed over, it is commissioned — every device checked, every scene tested, every control confirmed to work as intended, and the whole system tuned. This is the quality-control stage, where problems are found and fixed before you ever see them, not after.
A properly commissioned system simply works from day one. Skipping or rushing this stage is where many poor installations go wrong — the devices are in, but the system was never properly tested as a whole.
Stage 6 — Handover and the project file
Handover is where the system becomes yours, and it is more than just switching it on. A proper handover includes a working, tested system; a walkthrough or training so you and your family can use it confidently; and — critically on KNX — the ETS6 project file.
That project file is the record of exactly how your system is programmed. With it, any qualified integrator can service, change or expand your system in future. Without it, you are locked to whoever installed it. This is one of the most important things to insist on, and a clear marker of a professional integrator — it is exactly how we hand over every KNX project.
Stage 7 — Support after installation
A good installation does not end at handover. A home automation system is something you live with for years, so ongoing support matters — someone to call if something needs adjusting, help as your needs change, and maintenance for the system over its long life. When choosing an integrator, it is worth knowing what support and service they offer after the project is done, not just how they install it.
Planning your installation
A few honest principles to plan well:
- Plan it early — ideally during the build. The wiring is the one thing you cannot easily retrofit, so the best time to plan automation is while the home is still being built or renovated. A finished home can still be done, just with more constraints.
- Design the whole home, install in phases if needed. You do not have to do everything at once, but plan the complete system and backbone up front so you can expand later without reopening walls.
- Choose the platform for the long term. An open standard like KNX keeps the system reliable, serviceable and expandable for decades, rather than locked to one brand or dependent on the internet.
- Insist on the project file. Make the ETS6 project-file handover a condition, so you are never dependent on a single installer.
What drives the cost
Cost is the question everyone asks, and the honest answer is that it depends — on the size of the home, how much you automate, wired versus wireless, and the quality of devices and finishes. Rather than a single figure, the price is shaped by the scope and the choices you make.
What a good quote should include is the whole process: supply of the equipment, the installation and wiring, the programming, commissioning and the handover — not just the hardware. Beware a quote that covers only the devices and leaves the real work vague. Because the cost depends so much on your specific home, the right approach is a proper specification and estimate — our detailed guide to home automation cost in India breaks down the factors, tiers, and what is included.
If you are upgrading an existing system rather than installing fresh, our step-by-step upgrade guide covers that path.
Getting it right
A home automation installation is only as good as the process behind it — the survey that understands your home, the design that plans it, the wiring that forms the backbone, the programming that brings it to life, the commissioning that proves it works, and the handover that makes it truly yours. Done as a proper project, it gives you a system that is reliable, easy to use and serviceable for years. Done as a rushed box-fitting, it does not.
We design, install, program, commission, and hand over home automation across Delhi NCR as one complete project — including the ETS6 project file, so your system stays yours. Explore our home automation service.
Two ways to start:
- Book a consultation → contact us
- Call us directly: +91-94148-16207
FAQs
What are the steps in a home automation installation?
A professional installation runs through clear stages: a site survey and needs discussion; a system design and specification; the wiring and infrastructure; programming (on KNX, this is ETS6); commissioning and testing; and handover, including the project file. For a new build, the wiring goes in during construction; for a finished home, it is adapted to what can be accessed. Good installation is a designed project, not just fitting devices.
How long does a home automation installation take?
It depends on the size of the home and the scope of the system. A single area or a small setup is quick, while a whole-home or villa system is a longer project spanning the design, wiring, programming, and commissioning stages — often running alongside the construction or interior timeline. The best way to know is to have it scoped for your specific home, since a realistic schedule is part of a proper plan.
When should home automation be installed — during construction or after?
The cleanest time is during construction or a renovation, because the wiring and infrastructure can be built into the walls before finishes. A finished home can still be automated, often with a mix of wired and wireless depending on what can be accessed, but it is more involved. If you are building or renovating, plan the automation in early — it is the single biggest factor in a clean result.
What does a home automation installation cost?
It depends on the size of the home, how much you automate, whether it is wired or wireless, and the quality of devices — so it is best estimated for your specific home rather than taken from a fixed figure. A good quote includes supply, installation, programming, commissioning, and handover. Our detailed home automation cost guide breaks down the factors and tiers for Indian homes.
What should I receive at handover?
At handover, you should get a fully working, tested system, a walkthrough or training on how to use it, and — crucially on KNX — the ETS6 project file. That file is the record of how your system is programmed; with it, any qualified integrator can service and expand the system in future. A handover without the project file leaves you dependent on one installer, so insist on receiving it.
Who should install a home automation system?
A qualified integrator who designs, wires, programs, commissions, and hands over the system as one project — and who gives you the project file. Home automation spans wiring, programming, and several systems working together, so proper installation is an engineering and design job, not a device-fitting one. Choosing an integrator who does the whole process properly is what makes the system reliable for years.